

Builder gel is a special nail product that helps you get strong, shiny nails. Many people love it because it can make nails look full and healthy. In this guide, you will learn what builder gel is, how to use it, how long it lasts, its benefits, costs, and how to care for and remove it. By the end, you can have salon-quality nails right at home. Let’s get started!
What Is Builder Gel?
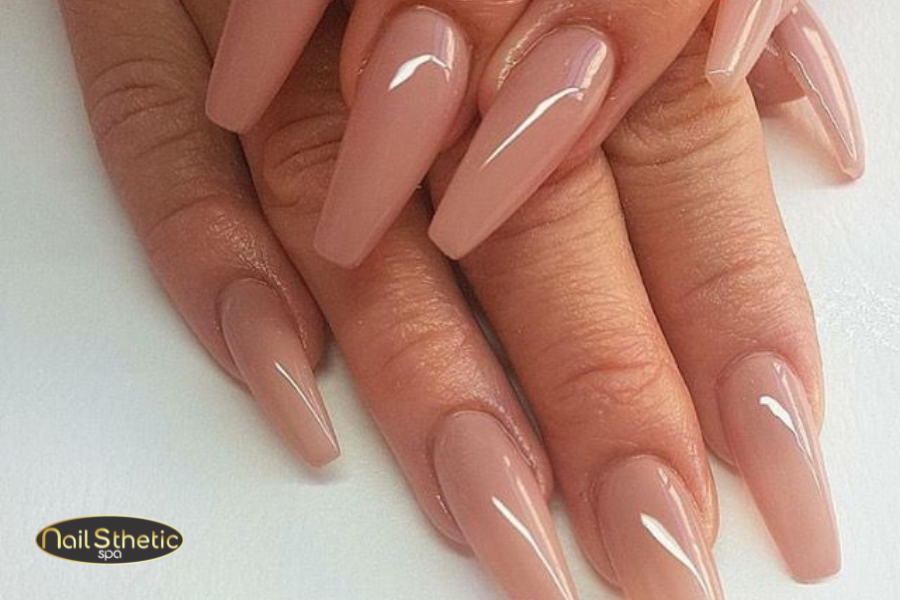
Builder gel is a thick, clear or tinted gel used to create or strengthen nails. It sits on top of your natural nail or on a nail tip. When you apply builder gel, you shape it to the nail and then cure it under a UV or LED lamp. The lamp helps the gel harden and become strong. Unlike regular gel polish, builder gel adds extra thickness and support. Many nail techs prefer it for nail extensions because it is light but very durable.
How to Use Builder Gel
Using builder gel at home might seem tricky, but with a few simple steps, you can do it like a pro! Here’s how:
- Prepare Your Nails: Start with clean, dry nails. Remove any old polish and gently push back your cuticles. Lightly buff the nail surface to help the gel stick better.
- Apply a Base Coat: Apply a thin layer of gel base coat. Cure it under your UV or LED lamp for the recommended time (usually 30-60 seconds).
- Apply Builder Gel: Take a small amount of builder gel and apply it evenly on your nail. You can build the shape and length you want by layering the gel. Cure under the lamp after each layer.
- Shape and Smooth: After curing, use a nail file to shape your nails and smooth out any bumps.
- Apply Top Coat: Finish with a gel top coat to add shine and protect your nails. Cure it one last time under the lamp.
- Cleanse: Wipe your nails with a lint-free cloth and some rubbing alcohol to remove any sticky residue.
How Long Does a Builder Gel Last?
One of the best things about builder gel nails is their durability. When applied correctly, builder gel nails can last 2 to 4 weeks without chipping or lifting. The exact length depends on how well you care for your nails and your daily activities. If you avoid harsh chemicals and use gloves while doing chores, your nails will stay beautiful longer. For comparison, you can also learn how long Gel-X nails last and see which style works best for your lifestyle.
Benefits of Builder Gel
Builder gel offers many advantages over other nail products:
- Stronger Nails: Builder gel strengthens weak or brittle nails, helping them grow healthier.
- Flexible and Lightweight: Unlike acrylics, builder gel feels more natural and is less likely to crack.
- Long-Lasting: It stays chip-free for weeks, saving you time on nail repairs.
- Customizable: You can build length, add designs, or create overlays.
- Less Odor: Builder gel has little to no smell compared to acrylic products.
Studies show that gel-based nail products are gentler on nails than traditional acrylics, reducing damage and improving nail health over time. You can read more about the differences in the best acrylic nail options in Corona, CA to see which type suits your needs best.
Builder Gel Costs
The cost of builder gel nails varies depending on where you buy your supplies and whether you do it yourself or visit a salon.
- DIY Builder Gel Kits: Typically cost between $20 and $50 and include gel, a lamp, and basic tools.
- Salon Application: Can range from $40 to $80 per session depending on location and nail design.
Doing builder gel nails at home can save money in the long run, but professional application ensures the best results and safety.
Care and Removal Tips
Care Tips
- Keep Nails Dry and Clean: Water can weaken the bond between the gel and your nail. Wear gloves when washing dishes or cleaning.
- Apply Cuticle Oil Daily: Builder gel can dry out your cuticles. A drop or two of cuticle oil every day keeps the skin around your nails healthy.
- Avoid Using Nails as Tools: Don’t use your nails to open cans or scrape surfaces. This can cause lifting or cracking.
- File Gently If Needed: If a small chip happens, gently file it down and apply a drop of gel top coat to seal.
- Book Regular Fills: Visit a nail tech every 2–3 weeks to fill in growth and fix any lifting—see our work on Instagram.
Removal Tips
-
- Do Not Peel or Pick: Peeling off builder gel can pull off layers of your natural nail, leaving them weak and thin .
- Use Acetone Soak:
-
- File the shiny top layer of gel to break the seal.
- Soak a cotton ball in 100% acetone. Place it on the nail and wrap the finger in foil.
- Wait 10–15 minutes, then gently push off the softened gel with an orangewood stick or cuticle pusher.
- If some gel remains, rewrap and wait another 5–10 minutes.
- Buff and Hydrate: After soaking off, gently buff any leftover gel residue. Wash hands and apply a rich hand cream and cuticle oil to restore moisture.
- Consider Professional Removal: If you’re unsure, visit a nail tech. They have special tools and know-how to remove builder gel safely.
Conclusion
Builder gel is a fantastic option for anyone looking to achieve strong, long-lasting, and beautiful nails. By following the correct steps and avoiding common mistakes, you can enjoy salon-quality nails at home. Remember to invest in quality products and tools and take good care of your nails to maintain their health.
If you want professional nail care or more nail services, Nailsthetic Spa in Corona, CA is a great place to visit. Their trained staff offers a wide range of services, including manicures, pedicures, acrylics, gel-x, nail art, facials, waxing, and more. They ensure every service is safe, efficient, and tailored to your needs. Contact Nailsthetic Spa today to learn more and book your appointment for the best nail care experience!